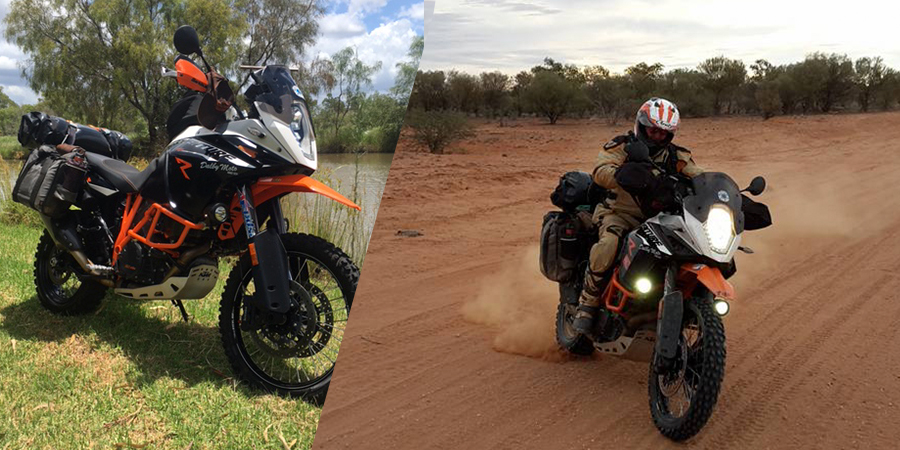
If you didn’t catch the first segment on Craig Hartley’s “Next Level” 1190 Adventure R, be sure to find out what this Australian adventure riding legend has put into making his 1190 Adventure R truly unique. And who knew a motorcycle rider could be this articulate? When it comes to talking about his bike, there is no stopping him!
PART II Includes;
Stage 4 – Steering Damper and Radiator Guard
Stage 5 – Fork Springs, Fork Valves and Fork Bleeders
Stage 6 – Quick Access to Often Used Bits
Stage 7 – Rims & Tyres
Words by Craig Hartley
 STAGE 4 – Steering Damper & Radiator Guard
The 1190 range of KTM’s come with adequate steering dampers that work fine in most on and off road conditions, however I did find that when fully loaded out west and tyres probably going off a bit, that in situations like crossing from left to right lane over the raised loose centre gravel hump, that occasionally I would get a short and fast violent head shake or rear wheel whip.
Probably reasonably normal considering the conditions, but when being used the 950/990’s with heavier dampers that absorb these moments with less fuss, then obviously that is what we want.
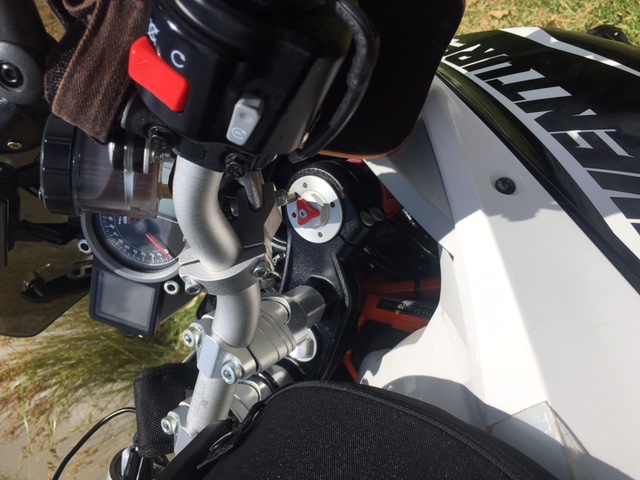
Scott/ Ohlin have under bar mounted steering dampers and mounts available, but I like the idea of the original under lower triple clamp damper, so while searching around, we found that Hyperpro have a replacement gas /oil damper complete with reservoir and adjustable damping , and what’s better is it sells for close to half of the price of the under bar mounts. Good things are it fits perfectly where the original was, there is plenty of damping adjustment and the unit is very light plus it is easy to fit.
I fitted the KTM radiator gaurd to cover the radiator to protect from rocks and the like.
It does the job well and is easy to fit and light weight, but one complaint I would have with it is that it should drop down another 10mm at the bottom of the radiator. Not a biggy, but a quick unplanned excursion off the deep sand on the Abandoned Gunbarrell, did see the smallest mark on the low side of the radiator from a bit of scrub.
For a bit more weight and reasonably similar money, B&B do a alloy radiator Gaurd that offers a some more protection, but the KTM one is still a great option and works well.
 STAGE 5 – Fork Springs, Fork Valves and Fork Bleeders
As is the case with all adventure bikes, and even a lot of road bikes in different brands, they all seem to have to softer fork springs.
I have found this with a wide range of bikes I have owned. The rear shock Spring is right on the money for say my weight, but the fork springs are for a person 20-30kgs lighter.
Before the ADVX I fitted a heavier set of fork springs and added 25mls of oil, along with this I fitted fork bleeders which are always a good accessory to let out built up air pressure, especially towards the end of a big day when either your body is getting a bit fatigued or the air pressure has built up making the forks feel harder.
Fork bleeders are also great for when transporting the bike, as once strapped down, just push the button to relieve pressure from within the forks.
Even though I was happy enough with the forks across Australia , I felt that on occasional short sharp hits, there compression was a tad hard, so Nick Leggatt at Dalby Moto performed his magic and made the first section of the stroke a little more compliant and while at it, I got him to give the last half of the stroke a bit more resistance to bottoming.
Not that there was anything that wrong with the front end, but for me the end result was a more confident and plush front end not only on the small hits, but also on slightly more aggressive style riding.
STAGE 6 – Quick Access to Often Used Bits


When doing big k’s and bigger days, there is often someone needing a quick tweek of something along the way, so there’s nothing worse than having to offload gear or open saddlebags for a minutes work.
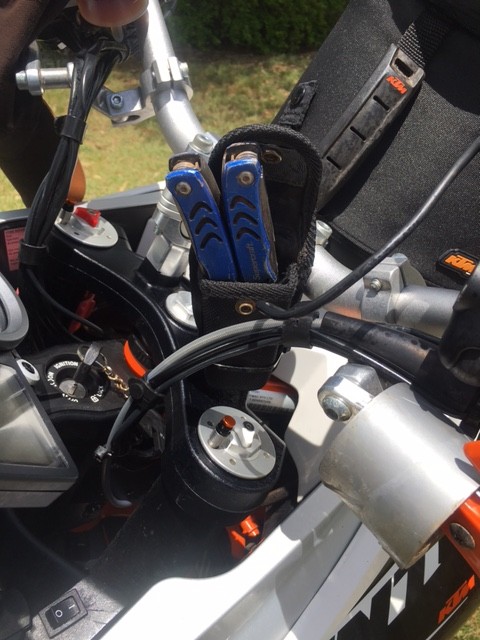
On the bars I fit the multi tool which has pliers, cutter, knife , screw drivers and all the other gear that they carry. On the Barkbusters, I put a roll of 100mph tape, always good for something.
In the photo you can also see the spotlight switch which has the relay underneath it, along with the fork bleeders.
My velcro adjustable cap lives on the right mirror, which is there for easy access so when the helmet comes off the goes on.
The quart pot lives in a nice safe spot on top of the saddlebags, these are great for having a quick boil up on the side of the road for a coffee, or even some hot water for some noodles or the like.
Depending on where I am riding I also use a jet boiler, which I carry in the same leather style case as the old quart pot, advice here is to wrap it in a plastic bag before you put it in case.
I strapped the quart pot to the top of the saddlebag racks and then run one of the saddlebag straps through the quart pot so that it doesn’t flap around. Yes you could put this in your saddlebag but why waste valuable room.
As can be seen by my saddlebag straps, not only do I cross them but I also double the upper part of the strap back through my saddlebag rack, which in reality takes away the need to have the Velcro strap bike across or under the seat. This makes for a very tight fitting set of saddlebags, and also means the straps cannot fall off the shoulder of the bag so to speak.
In my tank bag I run some dried meals, a few nibbles, coffee and sugar, my UHF , phone and other charges. I also have my sunglasses and very often a set of goggles for more extreme riding when I flip the visor up.
In the right pocket of the tank bag I run a small spray bottle of goggle cleaner and a good rag for cleaning goggles and visors, as well as a cigarette lighter. In the left pocket of the tank bag I have a double-ended screwdriver, earplugs, GPS tool.
There is another photo there of the close-up of how I slotted my poly tool holders in behind the saddlebags. Notice they are painted black, as well as being only slightly longer than the saddlebags, so they don’t make the bike look like plumbers Ute.
The old quart pot must of done over a quarter of a million kms now, and is always there for a quick cuppa, boil up for some dried food or even use as a cup for the stones. I carry a few bits inside the pot as well. If feeling more civilised and the likelihood of lighting a fire is less, I take the quick burner gas stove which I also carry where the quart post is in a similar leather case I got made up.
Even though I have always being a strong advocate against the poly pipe on the bikes, mainly because it makes the bike look more like a plumbers ute than a prestigious Adv bike, I broke the mould here because I wanted all the room available in the saddlebags, especially as one of them was dedicated mainly to fuel. That was the left one away from the muffler.
On this bike I slipped /hid them in behind the saddlebags, and painted them black to hide/disguise the tradie vehicle look. Worked a treat. Since the trip, I have made a mod to the right saddlebag by adding a soft half plastic Jerry can inside it. This just helps to hold its shape as the saddlebag rack has to be on an angle with the muffler under it.
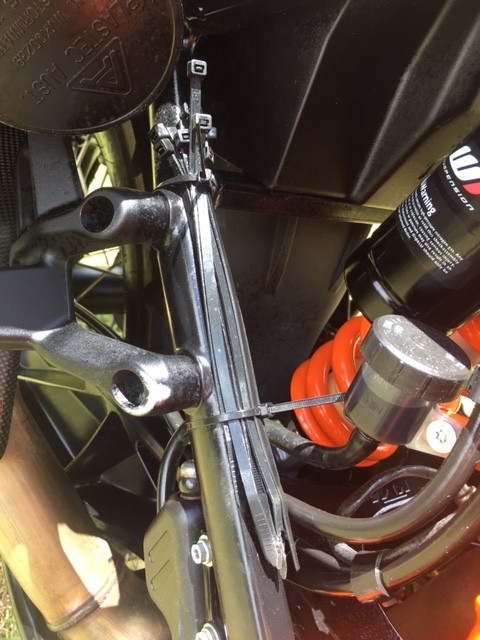
Zip ties are another thing that gets used regularly, especially as a support rider, so this spot was convenient and out of the way.
 STAGE 7 – Rims & Tyres
Even though I did the first 14000 kms on the front rim and kept it relatively dent free, some of the hard rocky roads between Birdsville and Hebel put an end to no dents.
As in the past on these big bikes, I elected to run the 1.60 front rim and in the A60 Excel style. Some people say these rims are to narrow for the larger bikes, but we have run them on ours and many of our clients bikes with good results.
Firstly the narrow rim is more protected by the tyre than with the wider rims, and secondly, the narrow rim seems to make the tyre cut a better line in the sand and dirt.
As we do as much non tar riding as possible for many years we used the Dunlop K490 front tyre, then when it went off the market the Michelin HP4 Starcross appeared, this has recently been deleted from the range, with the HP5 replacing it which seems to be performing in a similar manner to the HP4. The beauty of these tyres is they are a very large case in a 90/100 x21 size.
When I first used the HP4, I noticed far superior braking power, along with great steering capability in the dirt. The larger case size also works well on the narrow rim combined with the Bridgestone ultra heavy duty tubes front and rear.
For balancing, we always use the screw on to the spokes type which are reusable balance weights.
On the rear I have proven the wide rim is the one to use to get the best wear out of a tyre as it puts a larger footprint on the ground than on a narrow rim. A narrow rim may be better for traction in some situations, but the difference in tyre wear using the wide rim is literally thousands of klms better.
This was proven years ago on a ride with brother Tony when he rode a 950SE with narrow rim with me on the longest day, he started with a new tyre and mine had done 2500 kms, 2.5 days and over 3000 kms later and his tyre was worn the same as mine.
I have always liked the Dunlop 908 Rally Raid rear tyre, but definitely not the matching front as it wears quickly and has wobble tendencies. High mileage can be obtained out of these tyres with a bit of care, example being 690’s, 990,s and 1190’s doing cross Oz runs on the one tyre. They have a massively heavy case as well, which I have proven can do another 2000 kms plus on the case after there is no centre knob left. Handy when there are very few shops that stock adventure tyres.
There are other great performing tyres like the less aggressive Mitas EO7 which John Hudson used on a 1190 on the 2013 ADVX recy ride, it handled the Simpson well from what I could see.
Tyre pressures on both front and rear I sit at about 25psi and in deserts and the wet will easily go down to 18psi or less if needed .
***
That’s all from me right now, but stay tuned for Part III of my 1190 Adventure R ramblings in the next RIDE KTM Adventure news, featuring:
Stage 8 – Ergonomic Setup
Stage 9 – Fold Mirrors, Akro, Stand Plate
Stage 10 – High Guard, Extra Pre-Filters, Dongle
Stage 11 – Rear Shock & Miscellaneous